


In This Article

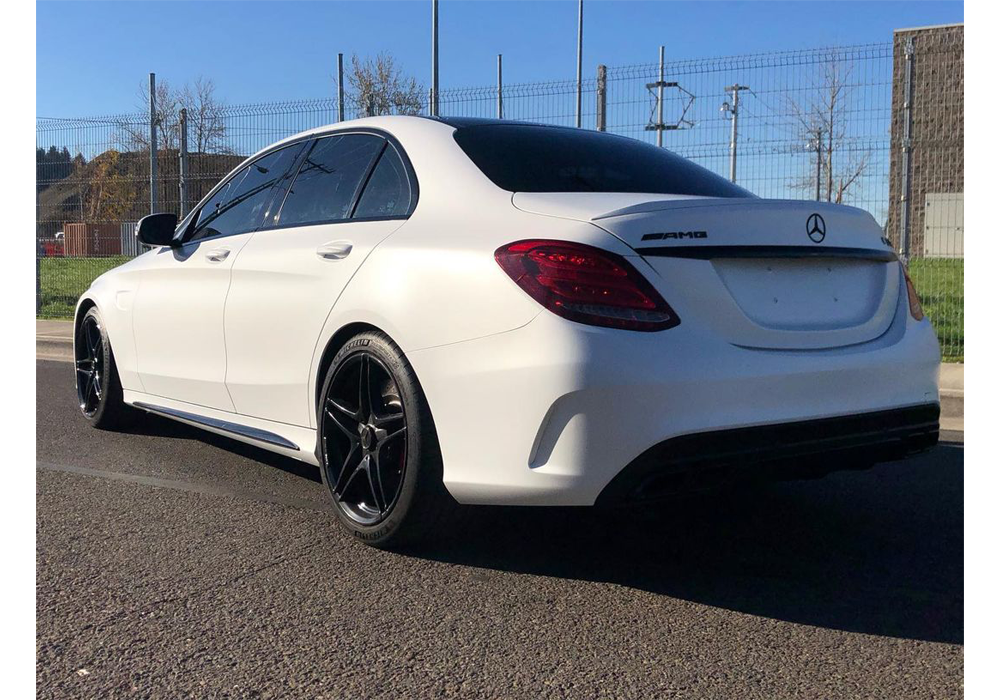
This Mercedes is a custom build sprayed in Peruvian White basecoat. Rose City Dip LLC ran the full Alpha Automotive Paint system — DTM primer-sealer, Peruvian White basecoat, HS Glamour clearcoat — for a finish that holds up under sunlight without fading. Over the recommended black ground coat, the color reads its full saturation and depth.
Below, you'll see how it came together, the products used, and the steps you'd follow to chase the same finish on your own build.

Free Download
Get the TSS Cheat Sheet — free.
Mix ratios, flash times, gun settings, and troubleshooting — one page, in your inbox in seconds.
Download the Free PDF →Meet the Builder: Rose City Dip LLC
Rose City Dip LLC sprayed this Mercedes from prep through final clear. The build runs the same Alpha Automotive Paint system we ship in every kit: DTM primer-sealer, Peruvian White basecoat, HS Glamour clearcoat, plus reducer, activator, and the cheat sheet. No corner cuts, no different products — the kit you'd buy is the kit on this car.
The Color: Why Peruvian White?
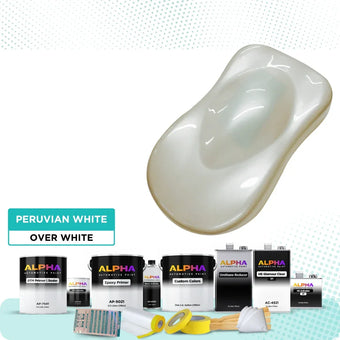
Peruvian White Peruvian White Basecoat is a super fine white pearl that keeps the bright white color without yellowing with more coats.
The black ground coat is the recommended ground coat for Peruvian White because that's how the color was designed to be sprayed. It delivers full coverage, the intended hue, and the depth and saturation the basecoat was formulated to show. Rose City Dip LLC ran the kit exactly as designed, and the panels are showing what Peruvian White was built to look like.
Want to spray a Peruvian White sample yourself?
This color doesn't have a pre-sprayed sample yet, but you can build your own DIY sample if you have spray equipment:
Every Way to Get Peruvian White
Whether you're painting a full vehicle, a motorcycle, a guitar, or just touching up with a spray can — Peruvian White is available for every project size. Each kit includes matched products sized for the job.

Peruvian White Vehicle Paint Kit
$574.93 USD
Shop Now
Peruvian White Paint Basecoat Midcoat
From$15.99 USD
Shop Now
Peruvian White Spray Can Midcoat
$39.99 USD
Shop Now
Peruvian White Motorcycle Paint Kit
From$510.65 USD
Shop Now
Peruvian White Bike Paint Kit
From$240.70 USD
Shop Now
Peruvian White Guitar Paint Kit
From$165.72 USD
Shop Now
Peruvian White Wheel Paint Kit
From$497.91 USD
Shop Now
Peruvian White Brake Caliper Paint Kit
From$187.71 USD
Shop Now💡 Pro Tip
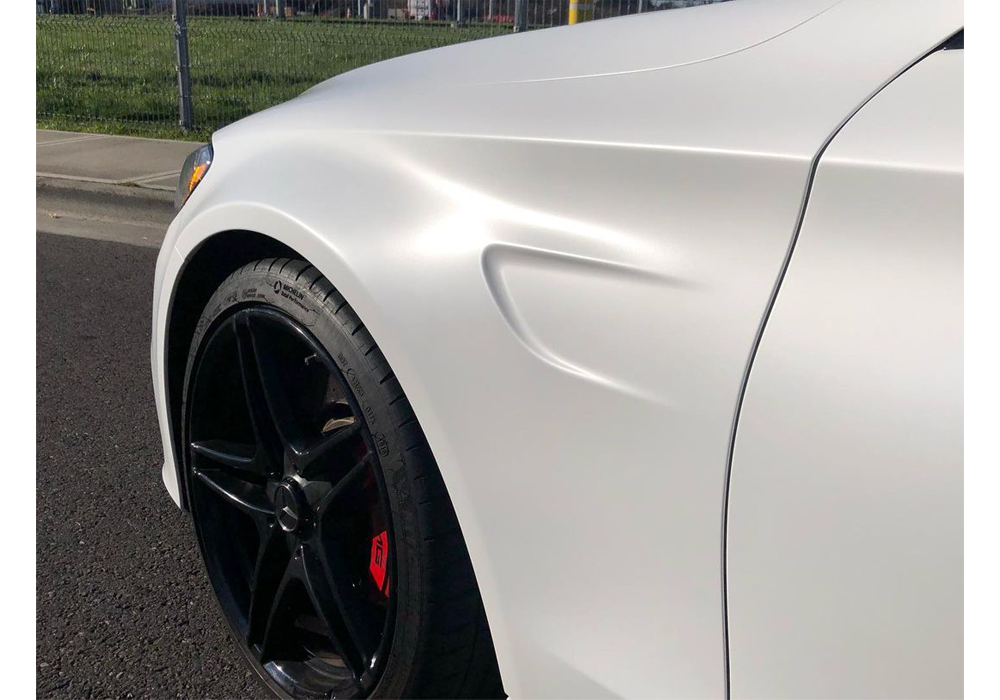
For best results spraying Peruvian White, take your final basecoat passes from a slightly farther distance than usual — it lets the metallics lay flat and the pearl read at full effect. Lock it in with a wet, even clearcoat for the deepest finish.
What's Inside the Vehicle Paint Kit
These are all the products included in the Peruvian White Full Vehicle Paint Kit. Every product is already matched and compatible — no hunting across brands, no guessing on ratios.
DTM Primer-Sealer (AP-7541) — Direct-to-metal primer that doubles as a wet-on-wet sealer. Mix at 4:1:2 with AH-7100 activator and Alpha urethane reducer to act as a sealer; this is the black ground coat Peruvian White was designed for — delivering full coverage, true hue, and the depth and saturation the basecoat was formulated to show. See the TDS.
Peruvian White Basecoat — An Alpha Custom Color basecoat. The basecoat in the vehicle paint kit is ready to spray right out of the can — no mixing with reducer required.
HS Glamour Clear (AC-4521) — High-solid 2K urethane clearcoat. Mixes 2:1 with AH-7100, no reducer. Wet, glass-like finish.
Alpha Urethane Reducer (AR-3000 Series) — Temperature-matched reducer for sealer/primer. Pick speed by climate. Kit basecoat is pre-reduced.
HS Activator (AH-7100 Series) — Hardener for both primer-sealer and clearcoat. Match speed to your temperature.
TSS Cheat Sheet — Laminated guide: mix ratios, flash times, coat counts, gun settings, and troubleshooting. Download the free PDF or order a free physical copy.
Optional Add-Ons
The vehicle paint kit has everything you need to go from prepped surface to finished paint. But depending on where your project is starting, these add-on bundles can save time and money on the prep and masking side:

Bodywork Bundle
$175.00
Body filler, abrasives, and everything for panel repair. Ideal if your project needs dent or rust repair before paint.
Shop Now
Light Bodywork Bundle
From $92.99
Dolphin Glaze finishing putty and OptiGrit sanding abrasives. Perfect for filling pinholes, minor scratches, and light surface imperfections.
Shop Now
Mask & Mix Bundle
$75.00
Mixing cups, strainers, masking tape, and masking paper. Everything you need for clean, precise masking and easy paint mixing.
Shop Now
Linear Blocking Tools Starter Set
From $236.50
CNC-cut polycarbonate sanding blocks with lifetime warranty. Produces perfectly flat, straight panels for a professional finish.
Shop Now
OptiGrit PSA Sandpaper Bundle
$64.99
Complete PSA sandpaper set in 80, 180, 220, and 320 grit. The full grit progression for blocking and prep, sized for long boards.
Shop NowThe Complete DIY Process
Step 1: Strip and prep the body
Rose City Dip LLC took the Mercedes down to a clean working surface. For your build, remove all old paint, rust, and filler down to clean steel or a sound prior coating. Block-sand body lines straight, repair dents and imperfections, then work through progressively finer abrasives until the surface is uniform and ready for primer.
Step 2: Lay the DTM primer-sealer (black ground coat)
Mix DTM Primer-Sealer (AP-7541) at 4:1:2 with AH-7100 activator and Alpha urethane reducer to use it as a wet-on-wet sealer. Spray it for Peruvian White — this is the ground coat the color was designed for, delivering full coverage, true hue, and color depth the basecoat was built to show. Tack the surface clean, lay even passes, and let the sealer set up before basecoat.
Step 3: Spray Peruvian White basecoat
The Peruvian White basecoat in the Peruvian White Vehicle Paint Kit is ready to spray straight from the can — no reducer to mix. Tack again, then lay your Peruvian White passes wet but controlled, building coverage gradually until uniform across every panel. Final basecoat passes can be slightly farther from the panel to let the metallics lay flat. Watch for stripes between passes and fix them while the basecoat is still working.
Step 4: Clear with HS Glamour
Mix HS Glamour Clear (AC-4521) 2:1 with AH-7100 — no reducer needed. Lay even, wet coats and let the clear flow out fully between passes. The 4521 is a high-solids 2K that buries the metallic surface and locks in depth.
Step 5: Cut, buff, and finish
Once the clear is fully cured, cut and buff to bring out the final wet shine. Color-sand any imperfections with a fine abrasive, then move through your buffing compounds to a finish polish.


Ready to Paint Your Own Build?
Everything Rose City Dip LLC Coating: Autoflex Coatings What You Need for the Peruvian Whit used — DTM primer-sealer (your black ground coat), ready-to-spray Peruvian White basecoat, HS Glamour clearcoat, reducer, activator, and cheat sheet — in one kit.
Build Your Peruvian White Kit — $574.93 USDLooking for a different color or kit size? Browse all car kits →
See It in Action
TSS painting tutorials and kit walkthroughs — the answers we get asked most.
Frequently Asked Questions
Peruvian White is Peruvian White Basecoat is a super fine white pearl that keeps the bright white color without yellowing with more coats.
The black ground coat is the recommended ground coat for Peruvian White because that's how the color was designed to be sprayed. Black or white sealer alternatives change the finish character — most pearl basecoats need black for full saturation; check the basecoat product page for the official recommendation. The Peruvian White Vehicle Paint Kit ships with the recommended ground coat by default.
Yes — the Peruvian White spray can uses the same basecoat formula as the kit, so it's the right call for nicks, jamb touch-ups, and small repair work. For best color match, spray over the same black ground coat used on the original panel.
Every Product Used in This Build

Peruvian White Vehicle Paint Kit
View →

Peruvian White Paint Basecoat Midcoat
View →

DTM Primer-Sealer AP-7541 Kit | Alpha Automotive Paint
View →

HS Glamour Clearcoat AC-4521 Kit | Alpha Automotive Paint
View →

Urethane Reducer AR-3000 Series | Alpha Automotive Paint
View →

HS Activator AH-7100 | Alpha Automotive Paint
View →
More From This Build
Additional shots from the project — before, after, in-progress, and detail.

Limited Time Deals
Clearance & Flash Sales
Discounted kits, closeout colors, and flash deals — check back often, these move fast.
Shop Current Sales →Big thanks to Rose City Dip LLC for running the system as designed. The Mercedes is exactly what these kits were built for.
Stay connected with the TSS paint community: follow tutorials and color reveals on YouTube, short-form builds on TikTok and Instagram, and join the Facebook community group for tips, troubleshooting, and real customer projects.
Want to be featured? Tag @thespraysource or email sales@thespraysource.com.


